Steps To Create New Client Site From Base Site
We currently include a base ecommerce site. The base site is considered as a template to build other client sites.
To create a new client site from base, follow the below steps.
1. Create New Project On DevOps
The new client sites will have it's own project on DevOps, just like Farro, Viridian and etc.
To create a new client site, we need to create a new project first. Go to DevOps (https://dev.azure.com/olympicsoftware) and click New Project button.
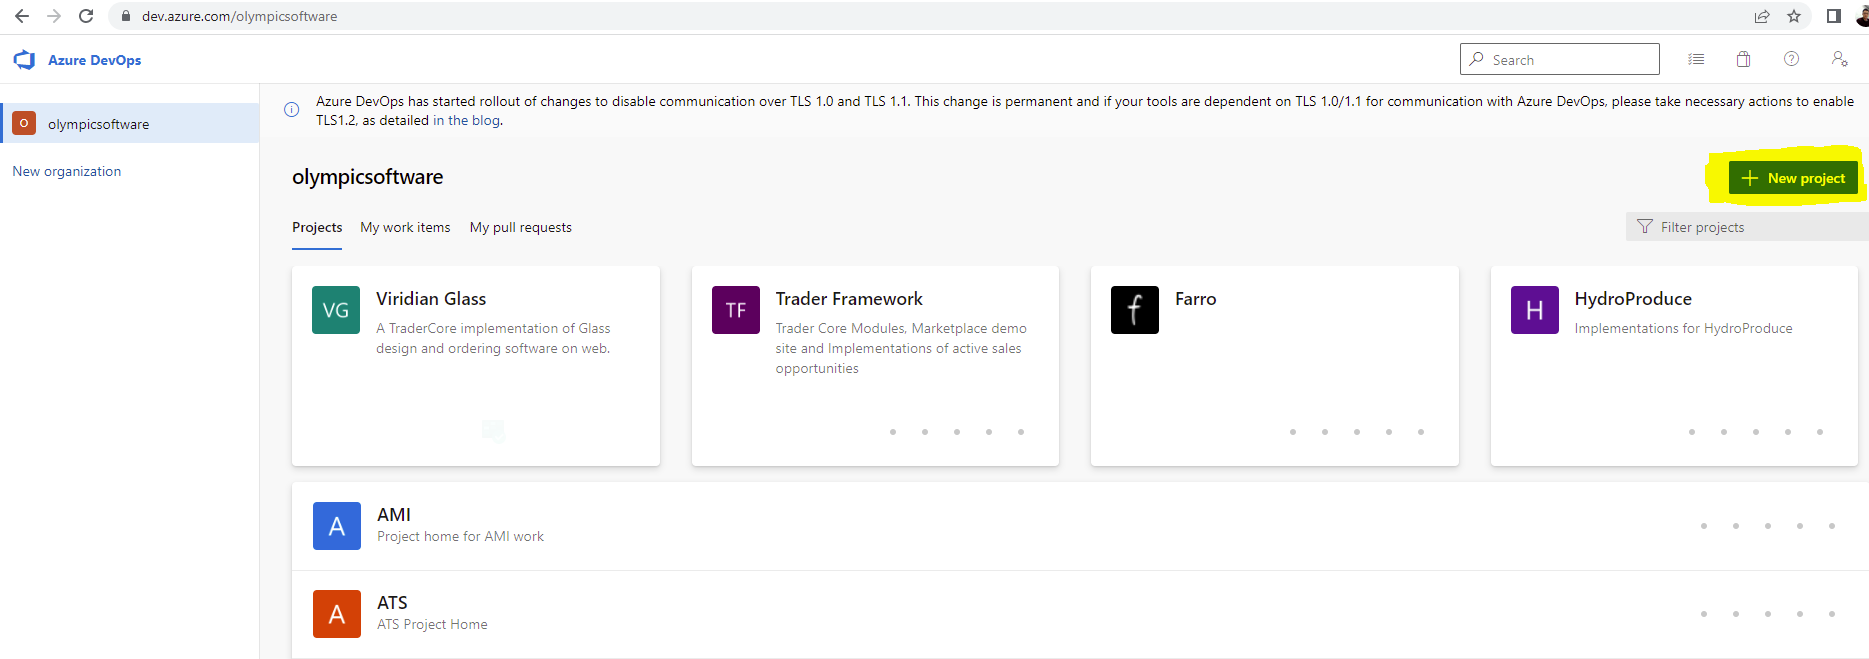
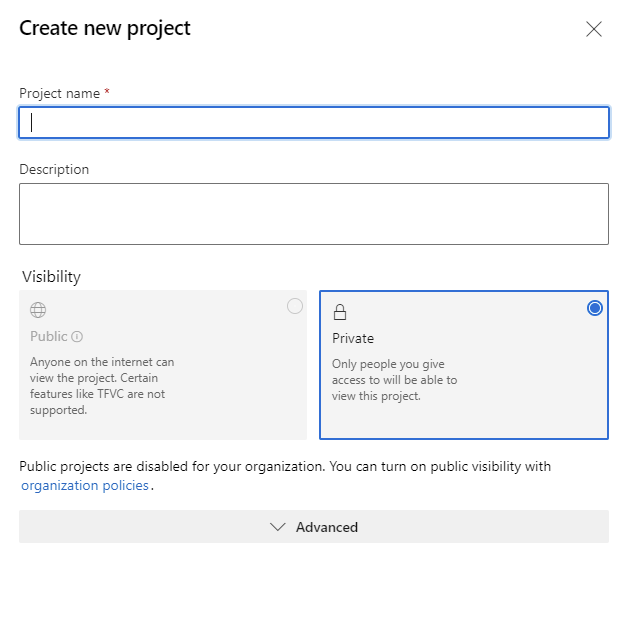
Enter the project name and a short description, the visibility of the project should be private.
2. Clone Base Ecommerce Repository.
Once the project is created, we need to import the code from base site repositoty.
First, we need to clone the base repository to your local machine. You can use visual studio, git bash and etc.
Ignore this step if you have already cloned base site before.
In this example, we are going to use Visual Studio.
Open Visual Studio.
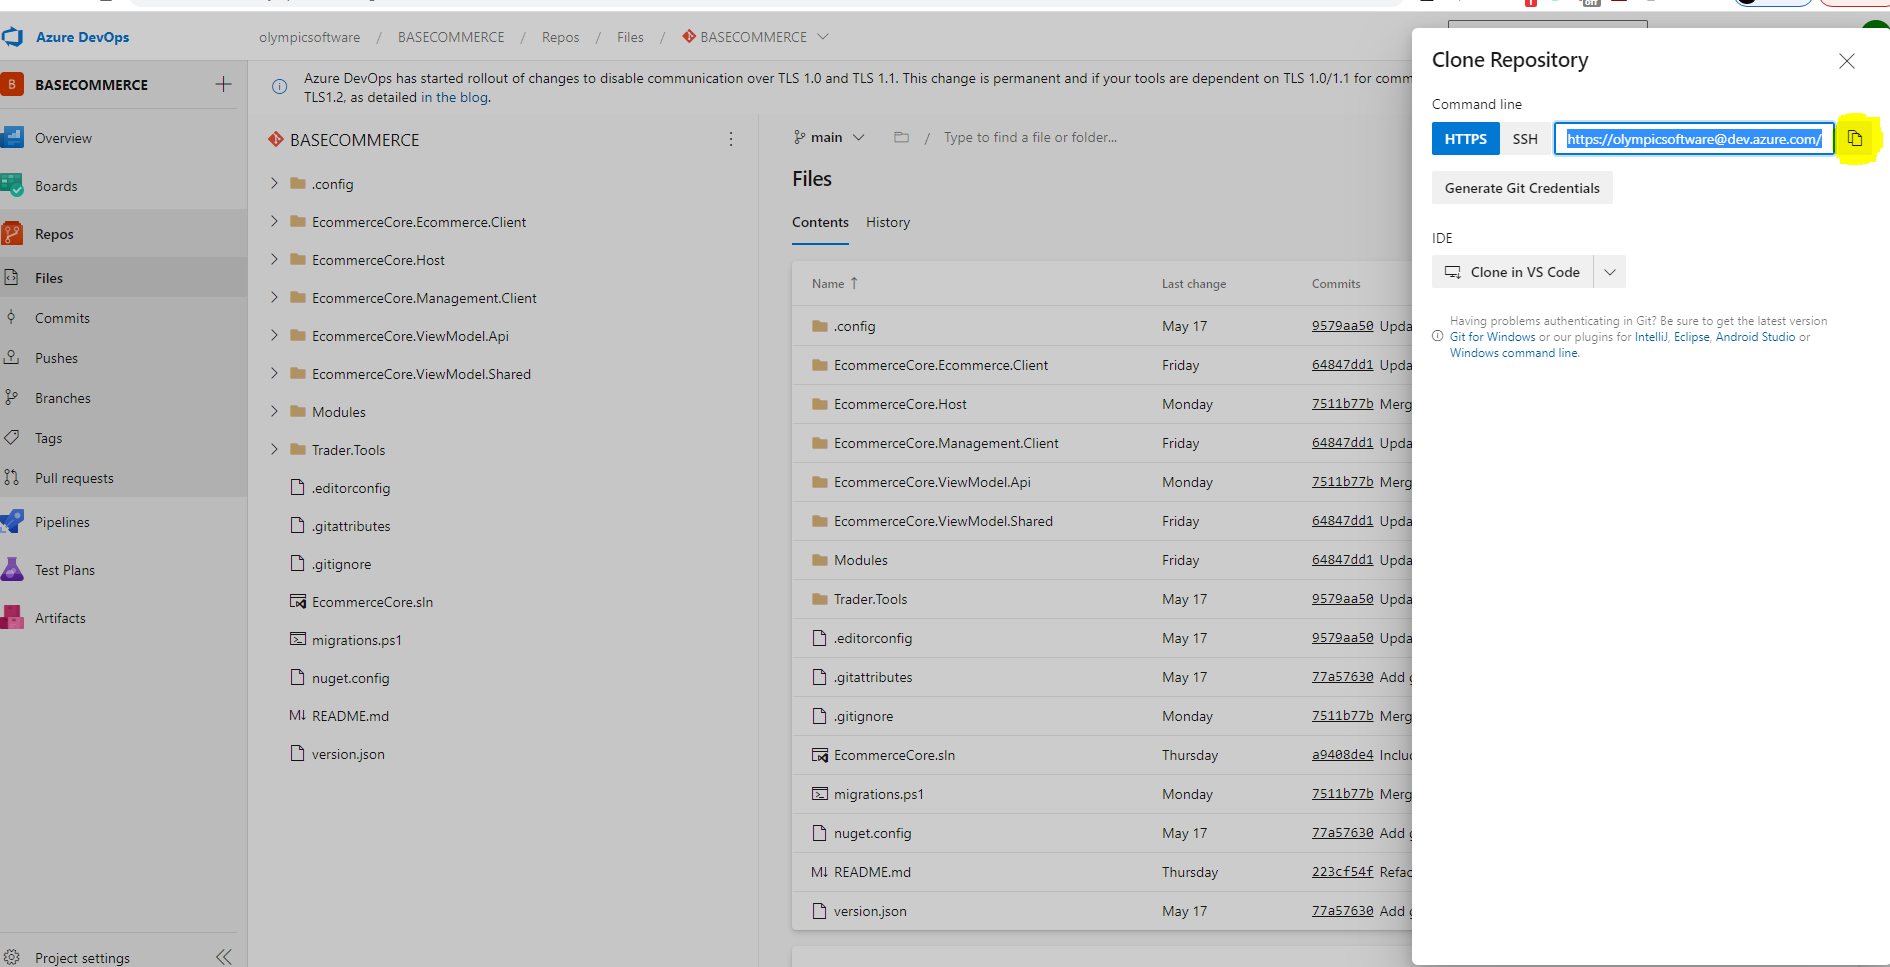
Navigate to the base site repositoty (https://dev.azure.com/olympicsoftware/_git/BASECOMMERCE). Click the Repos button on the left menu bar. Click the Clone button in the top right corner. Copy the URL by clicking the copy icon.
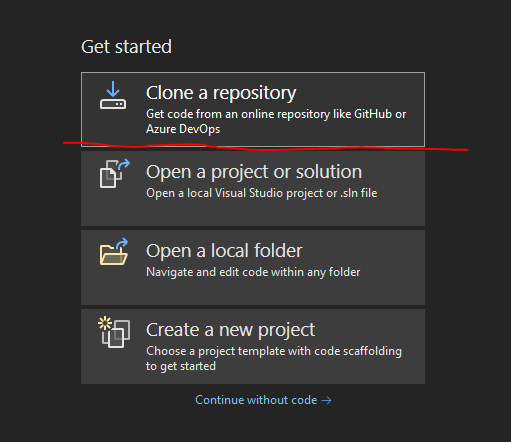
On Visual Studio, click Clone a repository.
Paste the repository URL and choose the local path for this repo.
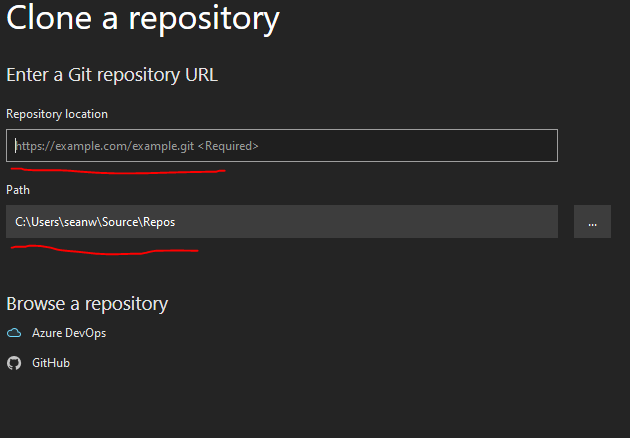
Click the Clone button in the bottom right.
If you get an error modal then dismiss the modal.
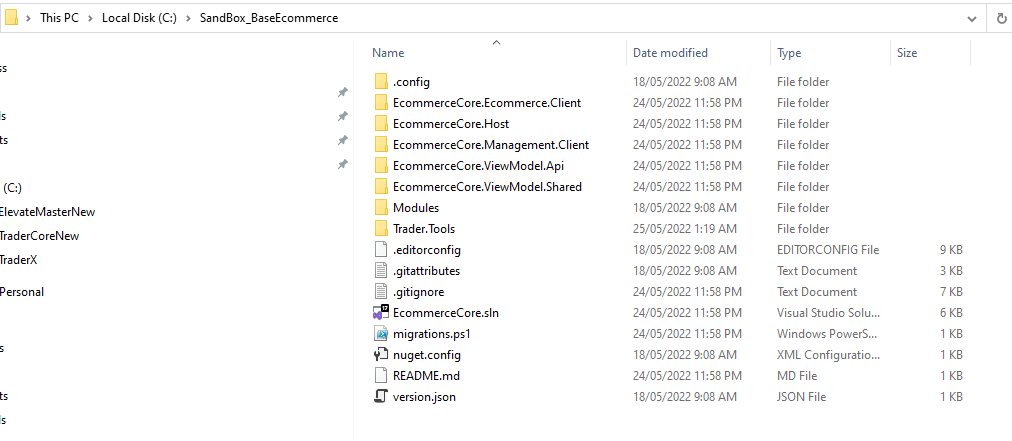
After the repository is cloned, navigate to the local folder on file explorer. You will see the following folder structure.
3. Clone New Client Site Repository.
Now we need to clone the new client site repositoty to your local machine. You can use visual studio, git bash and etc.
In this example, we are going to use Visual Studio.
Open another instance of Visual Studio.
Open a new tab on your browser, navigate to the home page of your new project (The new client project that you just created). Click the Repos button on the left menu bar.
Click the Clone in VS Code drop down, select Visual Studio
You may be asked to asscoiate an application, if so select Visual Studio.
Check the local path and click the Clone button.
If you get an error modal then dismiss the modal.
Now you have an empty repository cloned to your local machine. Remember the path of this folder, it will be used on step 4
4. Create The New Client Site By Renaming the Base Site
Now we need to import the code of the new client site from base site using Trader tool.
Navigate to the local folder of the base site on file explorer.
Go into Trader.Tools > RenameBaseSite folder. Press shift+right click on a blank area in the folder (not on a file name), then select Open PowerShell window here.
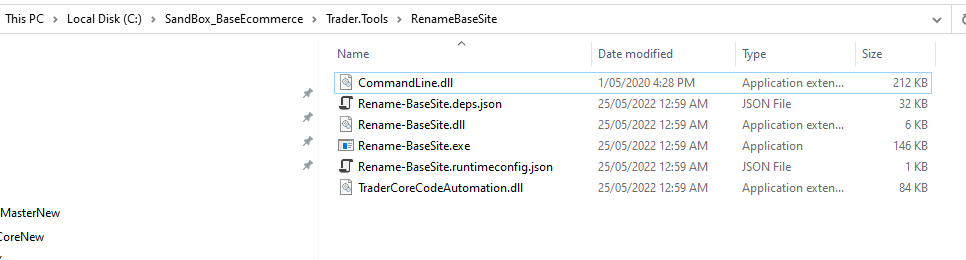
In powershell window, run .\Rename-BaseSite.exe -n {{new-client-name}} -d {{new-client-path}} to import the new client code. Replace {{new-client-name}} with name of the new client site, for example Farro. And replace {{new-client-path}} with the new client path from Step 3. For example .\Rename-BaseSite.exe -n Farro -d C:\Users\normarch\source\repos\Farro
This will take a few minutes to run.
After it's done, you will get all the files required on your new client site folder.
5. Run New Client Site On Visual Studio
Now we can try to run the new client site, althrough it still uses the base site's database. We will set up the new database for new client site on Step 6.
Open Visual Studio.
On the top menu select File > Open > Project/Solution, select the folder of the local project, click the Open button, and select the {{new-client-name}}.sln file, and click the Open button.
To view your project, click Solution Explorer (bottom right)
Right click {{new-client-name}}.Host, in the Solution Explorer menu, and select Set as Startup Project
Run the project by clicking IIS Express in the top menu bar.
Once this is complete, a local version of the application should appear in a browser.
6. Set up database and elastic
To generate a new database for the new client site.
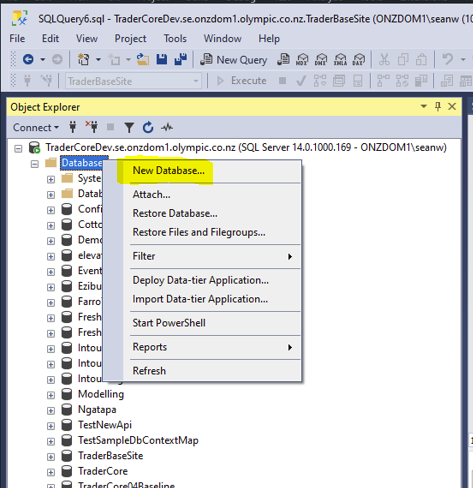
- Use SQL Server Management Studio to connect to Trader Core server. In the Connect to Server modal enter TraderCoreDev.se.onzdom1.olympic.co.nz as the Server name and click the Connect button. Then right click on Database icon, click New Database. You need to enter the name of the new database and click the Ok button. The name should related to the new client site, such as Farro.
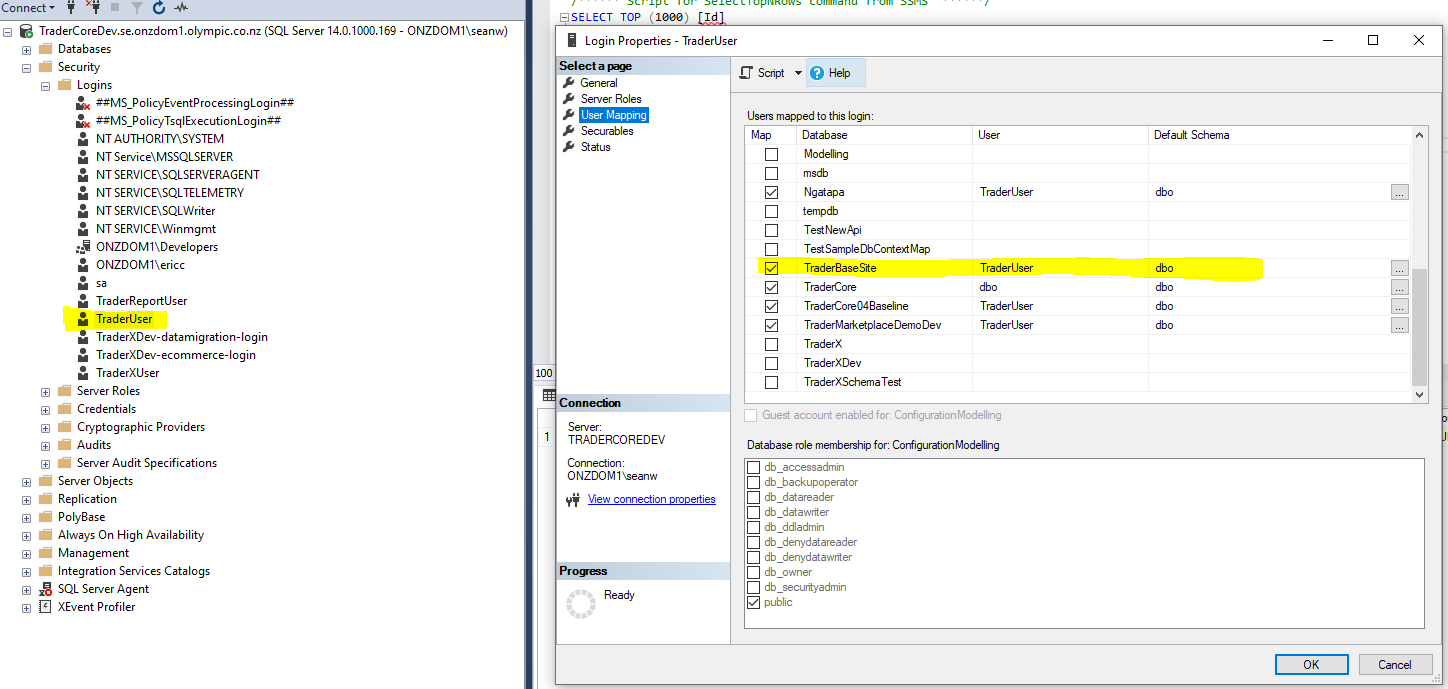
- Map the database user to the new database. On SQL Server Management, expand Security folder on Trader Core server, then expand Logins. Right click the user TraderUser, then select Properties. On the properties dialog, select User Mapping. Find the new database you just created and tick that checkbox, enter dbo in the Default Schema field and click the Ok button. In the below example, my new database is called TraderBaseSite.
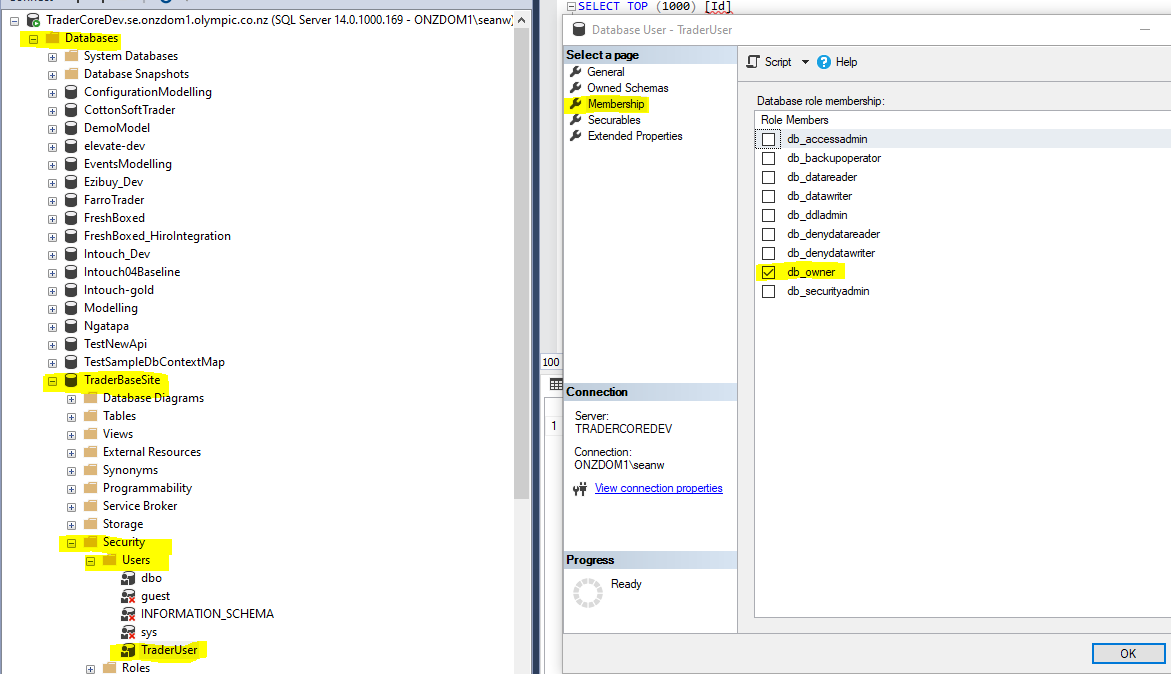
- Assign permission for the user on new database. On SQL Server Management, expand Databases folder for Trader Core server. Then find the new database you just created, go to Security->Users->TraderUser. Right click TraderUser and select Properties. On properties dialog, select Membership and tick db_owner and click the Ok button.
- In Visual Studio, in the Solution Explorer panel, expand {{new-client-name}}.Host > settings > appsettings.json and double click appsettings.development.json. Then replace the {{New_Database_Name}} with the name of your new database. Use Ctrl+S to save. Example below.
"ConnectionStrings": {
    "Core": "Data Source=TraderCoreDev.se.onzdom1.olympic.co.nz;Initial Catalog={{New_Database_Name}};User ID=TraderUser;Password=pass@word1;Encrypt=false;"
  }
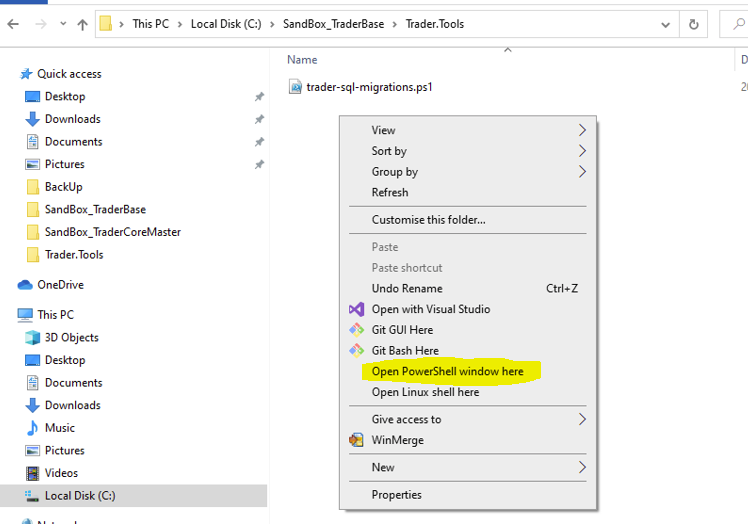
- Go into Trader.Tools folder in the new project, and use the trader-sql-migrations.ps1 powershell script to generate the script to create the database. Press shift+right click on a blank area in the folder (not on a file name), then select Open PowerShell window here.
In powershell window, run
dotnet tool install --global dotnet-ef --ignore-failed-sourcesfirst to install the tool.Make sure the directory c:\temp\migrations\ {{new-client-name}} is blank before starting.
Make sure the site is not running in Visual Studio.
Then run
.\trader-sql-migrations.ps1 ..\{{new-client-name}}.Host\{{new-client-name}}.Host.csproj c:\temp\migrations\{{new-client-name}}\The second parameter is the output directory of the generated migration script.After generating the _combined-script.sql script, copy the content of this script. Then open MS SQL Server Management Studio and execute the script on the new database.
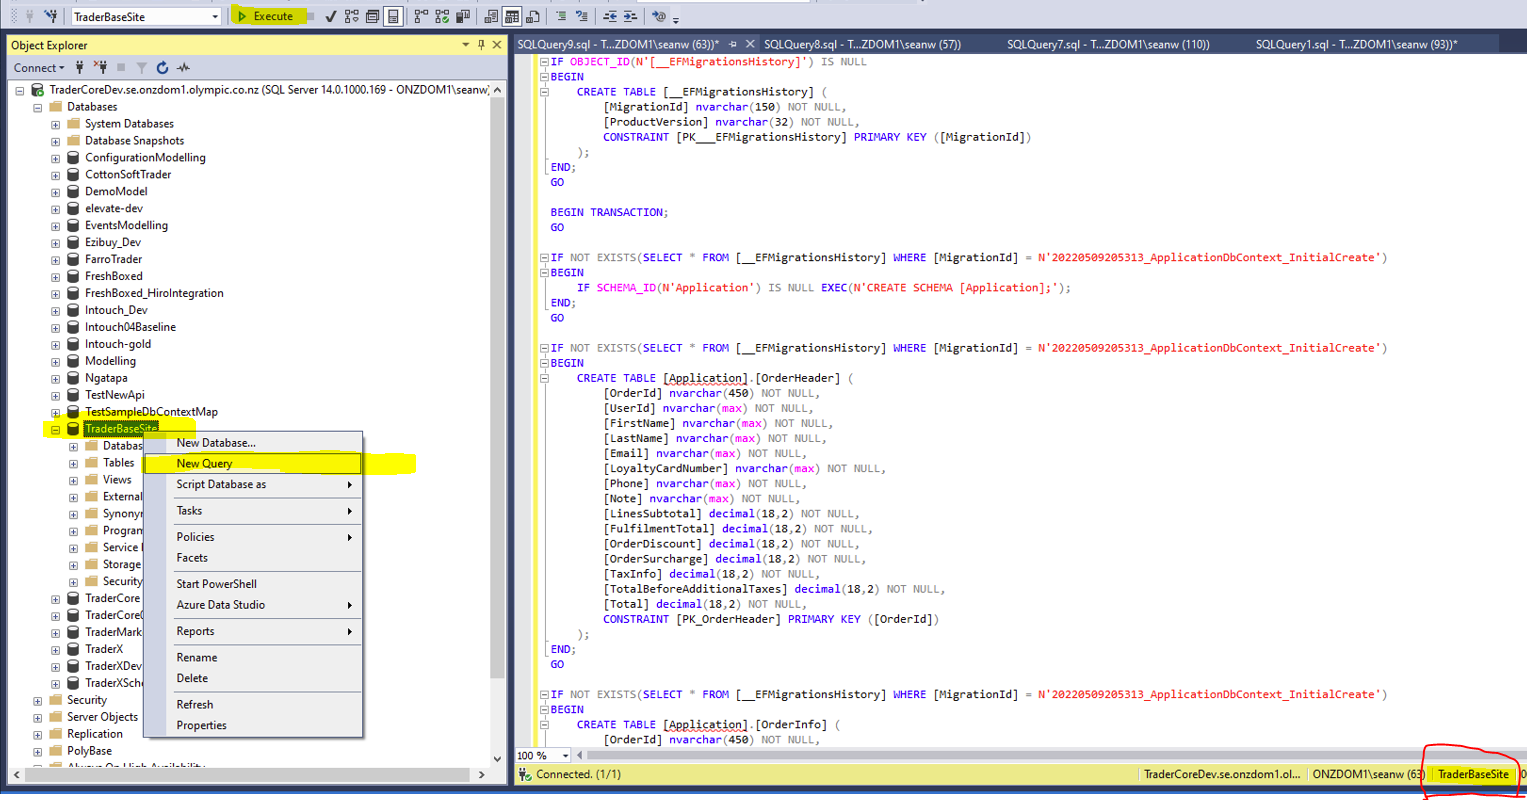
Right click the new database, select New Query. The paste the content of the _combined-script into the new query window. Before execute the query, make sure it is in the new database (Check the database on the right corner). Then click Execute. You should be able to refesh and see all the tables after execute the query.
To configure Elastic, go to Visual Studio, in the Solution Explorer panel, expand {{new-client-name}}.Host > settings > appsettings.json
- Find Trader.Core.IntegrationModule and change "AliasPrefix": "base-ecommerce" to "AliasPrefix": "{{new-client-name}}" in the appsettings.json file - note the {{new-client-name}} must be all lower case, as elastic requires all lower case.
"Trader.Core.IntegrationModule": {
    "NodeUrl": "https://751eb3973d56463d9b99fed1ae1fd3e2.ap-southeast-2.aws.found.io:9243",
    "Username": "elastic",
    "Password": "kNOU21zdAUt1jMayzTEipps2",
    "BatchSize": 200,
    "ChunkSize": 0,
    "MaxDegreeOfParallelism": 1,
    "AliasPrefix": "{{new-client-name}}",
    "AliasSuffix": "dev",
    "IntegrationConfigs": [
      {
        "ElasticAliasName": "product",
        "DefaultIndex": "productosindex",
        "SecondaryIndex": "productosforceindex",
        "IsCatalogIndex": true
      }
    ]
  }
Configs.json does not need to be modified - keep the variables, the variables will be replaced from deployment pipeline.
- Modify configs_dev.json to point to the new alias. For configs_dev, use the actual name instead of variables. Change all 3 instances of "base-ecommerce_product_dev" to "{{new-client-name}}_product_dev" - Note 1: the {{new-client-name}} must be all lower case, as elastic requires all lower case. Note 2: make sure that you retain the _product_dev in your Indexes names.
"Targets": [
    {
      "Id": "searchProduct",
      "Indexes": [
        "{{new-client-name}}_product_dev"
      ]
    },
    {
      "Id": "browseProduct",
      "Indexes": [
        "{{new-client-name}}_product_dev"
      ]
    },
    {
      "Id": "product",
      "Indexes": [
        "{{new-client-name}}_product_dev"
      ]
    }
  ]
7. Setup Administrator Account for New Client Site
Once we have the site running, we need to set up an administrator account that has accesss to everything.
First, gather the admin account information from client. We need to know which email they want to set as an administrator.
Then, start the site. You can run the site from Visual Studio by clicking IIS Express in the top menu bar.
Then sign up a new account using the email given by client.
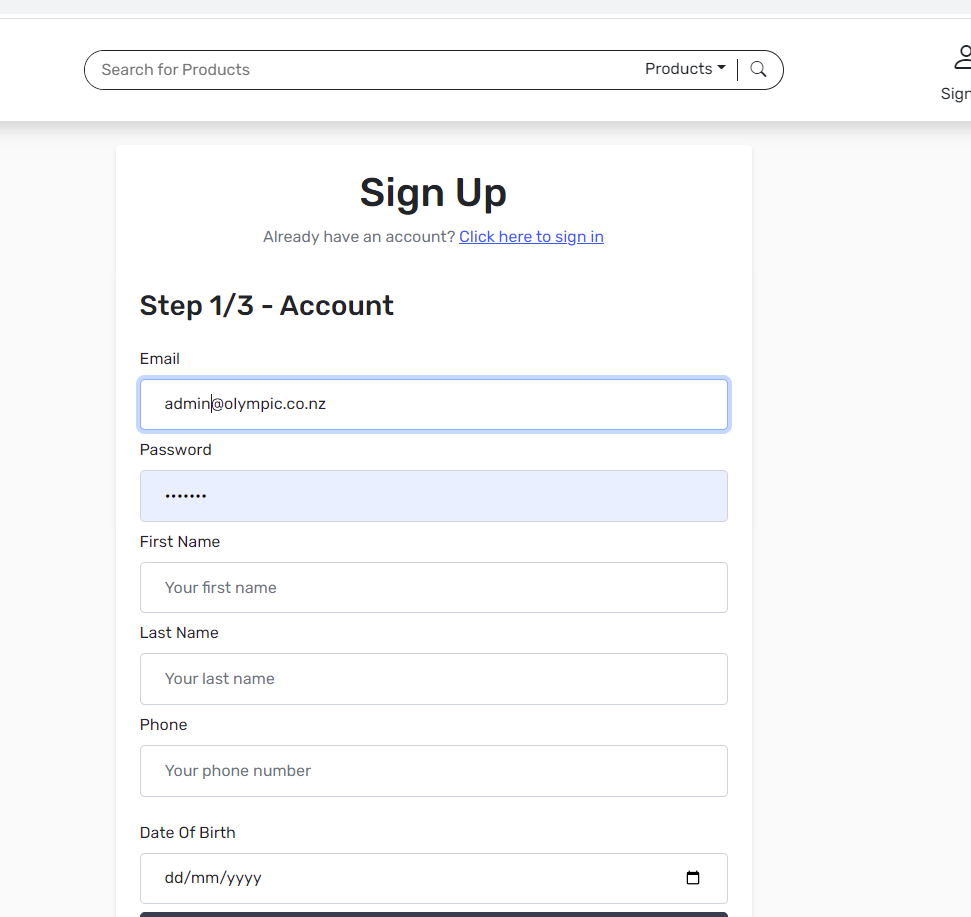
After the account is set, we need to grant admin access for it by running a sql script.
Navigate to the local folder of the new client site on file explorer.
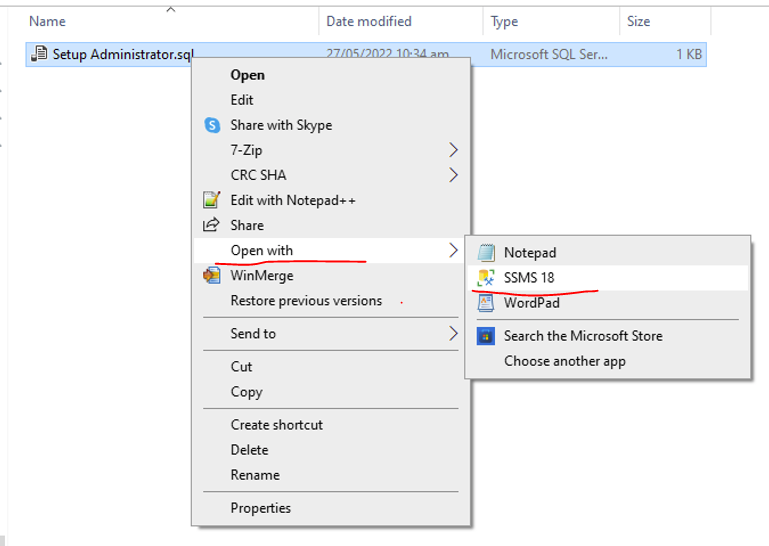
Go into Trader.Tools > HelpfulSqlScripts folder. Right click on Setup Administrator.sql then select open with sql server management studio (SSMS).
Before you run the script, replace {{enter_admin_email_here}} with the admin email account you just set.
Then click Execute button to run the script.

Build a new version of the site with Visual Studio.
After that's done, this account will have full admin access to management site.
Navigate to management site by adding a /manage after base url to test that.
8. Import the Seed Base Data
You'll now need to import the base seed data to ensure an end to end transactional flow can work.
Go into Trader.Tools > HelpfulSqlScripts folder. Right click on Seed Base Data.sql then select open with sql server management studio (SSMS).
To be done: Remove [Trader] reference.
Then click Execute button to run the script.
Build a new version of the site with Visual Studio.
9. Reindex Catalogs
Now we should be able to run the site. In Soultion Explorer, right click {{New_Client_Name}}.Host and select Set as Startup Project, then click IIS in the top menu. You should be able to navigate to management site by adding a /manage after base url.
On management site, navigate to Dynamic Catalog section, then click Products. You should be able to see a pre-defined catalog. Click REINDEX CATALOG to integrate products into elasicsearch, so we can search them on ecommerce site.
After that's done, the site should now have a catalog, a working CMS and a E2E payment flow.
10. Ensure End To End Flow Works
Ensure customer can register, add products to basket, checkout and place an order.
11. Replace Sample Catalog
If you'd like to replace your sample catalog, you can do so with these steps.
- You'll need to delete the existing catalog.
- Navigate to [DynamicCatalog].[CatalogItem] in your database.
- Select TOP 1000 or create a new query on the database
- Run the script
DELETE FROM [DynamicCatalog].[CatalogItem]This will delete all CatalogItems (Products) in the table - You can manually create products by hand by clicking the "Create Product" button, or you can bulk import products with a CSV file.
- To bulk import by CSV, you need to have the following attributes:
- Id - This will be the Id for your product
- Name - This will be the Name for your product
- Title - The name of the product to show on the product page
- OriginalPrice - The base price of the product
- SellPrice - The price to sell the product for on sale (match OrignalPrice if no sale)
- ProductStampImage - The URL to point to for the image to display on the product.
- Brand - The Brand of the product
- FulfilmentType - Fulfuliment Type, Use "Local" for default
- Description - The description of the product to use
- Generic - The categorization of the product
- Level1 - The top level category
- Level2 - The 2nd level category
- Click Import Products
- Select your CSV
- Click Import
- Reindex the Catalog
- Products should now be visble on the site.
12. Reskinning the site.
To reskin the site, you can get started by setting primary and secondary colors.
- Navigate to {{new-client-name}}.Ecommerce.Client\wwwroot\css\site\scss\themes
- You'll find a file called _alley-base.scss, you can open this up in a code editor.
- Inside, you'll find the following or similar content:
$primary: #373F50; $secondary: #0051DC; - These are called SASS Variables. You can adjust the colors of the hex code to change the site colors/theme.
- We use bootstrap, so any custom variables that you want to override can be found at getbootstrap.com.
- Rebuild the website to see your changes. You may need to disable or clear cache to see your new changes.
To replace the logos, you will need to replace the two logos in the {new-client-name}.Ecommerce.Client\wwwroot\images\logo\ folder. logo-min.svg is used for the header, while logo-white.svg is used for the footer. You can change these logos in the template code, but replacing these two will result in changes throughout the site with no changes required to the code.